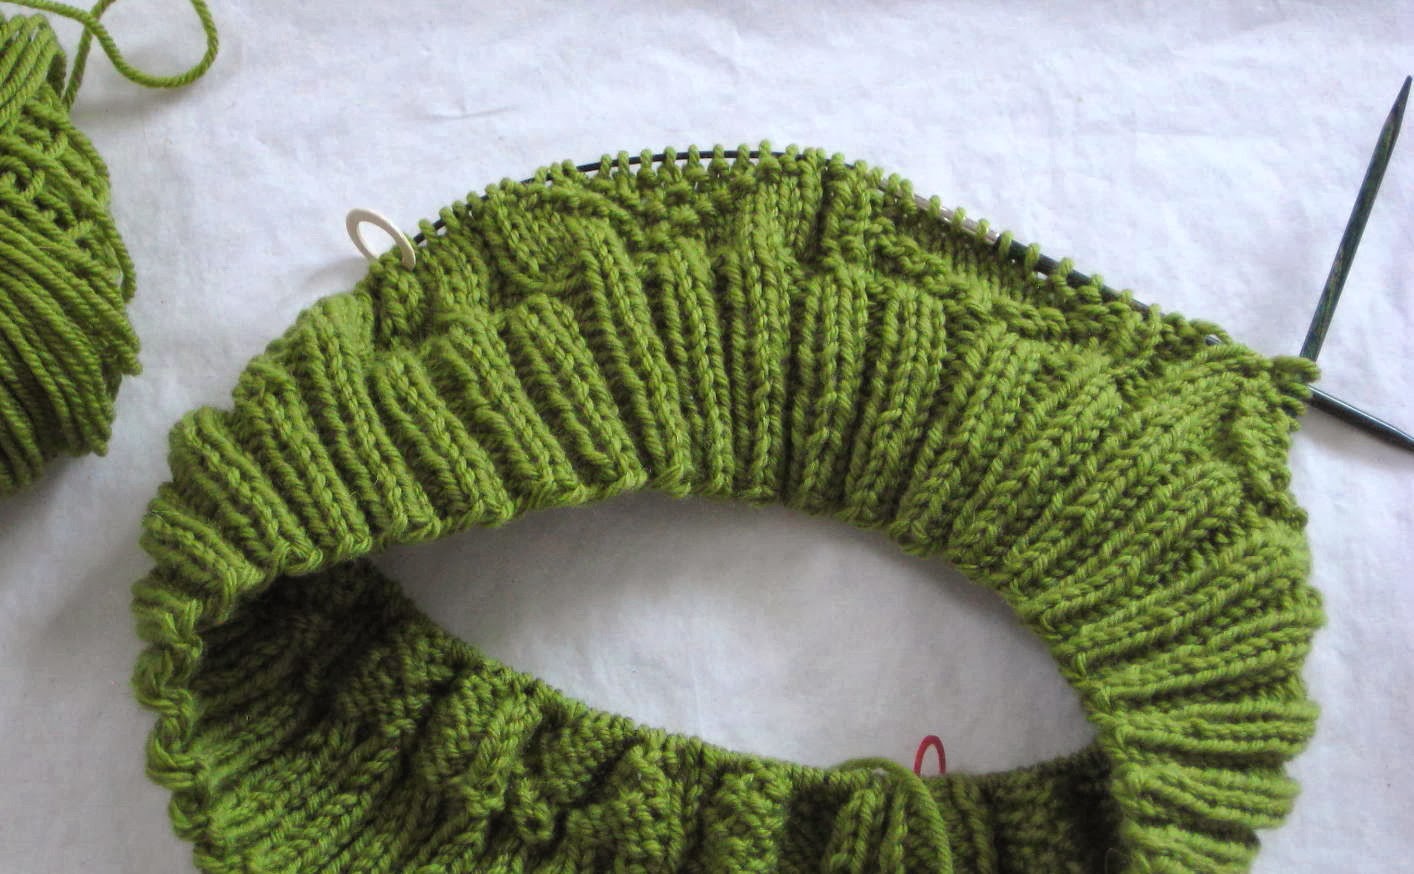
Knitting. Knitting like crazy. I am a knitting machine. Eriskay ganseys.
Here's Sheltering Gansey. Why sheltering? Silly, 'cause I'm sheltering. This one is made out of KnitPicks sport Wool of the Andes.
This one is not totally authentic in that a couple of the patterns are from other places than the British Isles. So, a fake cable from Japan, a star from a Danish book. Also, no underarm gussets nor shoulder straps. I did those things many years ago, and don't need to do them again. I'm not making historical ganseys. I am not a fisher lassie, nor do I sail or catch fish. Yep, NJ is on the Atlantic coast, but I'm inland.
An Eriskay gansey comes from this tiny little island called Eriskay, and has patterns on the body, a cross pattern, and then separate patterns on the bodice. Different patterns on the sleeve. All that patterning makes it very interesting. Just about the time you're bored with it all, you move on to another set of patterns.
Now this Eriskay gansey is more authentic. I used the real gansey yarn, Frangipani gansey yarn with a worsted spin on it. The patterns are all from fishing villages. But, again, no underarm gussets nor shoulder straps. This one is very warm! It didn't help that I stood out in 90 deg heat for the Hubz to photograph it. Bring on winter; I'm ready.
Quilting? Knot a Garden (see previous post) is now quilted, and the binding cut out. Just have to attach it and then sew down the binding. Eventually. In the heat of summer, I feel the need to knit warm woollies instead.
Showing posts with label ganseys. Show all posts
Sunday, July 26, 2020
Thursday, March 27, 2014
Finished! Designing and knitting a fisherman's sweater - part 7
Ta da! One fake gansey finished! The angle is a bit foreshortened, but you can get the idea of how it looks. Oh, and the yarn is a bit more olive than the camera wants to show.
Isn't it weird how where and when I photograph the sweater the color changes? The very top photo is the closest, but I'm posting these so you can see how nice everything looks once blocked. Ah well, I'm not a photographer.
All of this magic takes place when you block a woolly sweater. Here's how I do it.
I fill up a sink with lukewarm water and dunk the sweater into it. You really have to push it down into the water because wool resists water absorption and wants to float. So, gently, you push it into the water until it's thoroughly soaked. Then, supporting the garment with both hands, you lift it out, drain the water, and very very gently squeeze the sweater all over to get rid of excess water. Do this over and over, always supporting the garment as best you can. This sweater weighed a ton before I started the squeezing process, but I got rid of a lot of the water. The trick is "gentle". This is not superwash wool, and it will want to shrink or felt. Nope, don't want that. So treat it like a delicate object and gently squeeze.
When you think you have gotten rid of the bulk of the sogginess, dump the sweater onto a bath towel, roll it up and push down on it to get the towel to absorb water. Repeat with a couple of other towels. Your towels will be totally soaked, which is what you want.
Lay out the largest towel you have. Pick up the sweater by the shoulders, and it will lengthen like you can't imagine. Take a deep breath, and give it a couple of good shakes. Now your sweater will look like it would fit a giraffe. That's OK. What you've done is get all your uneven stitches to even themselves out. It works, but you have this bizarre garment that you will now lay out on that large towel.
Now you shape the sweater. It's still very wet and you can make it wider or narrower, make the sleeves look good, align the side and underarm fake seams. In short, you make it look like the sweater you want it to be. Takes a bit of time, but you need to do this so that it will look nice.
You'll need to change the towel under the sweater very often; it's absorbing all that dampness. Each time you do this, reshape the sweater. If you have a fan available, you can blow air onto the sweater and that will help a bit in drying time. You can expect it to take at least 12-14 hours to thoroughly dry, and even more if you have a dense garment or heavy yarn. A lace shawl will dry in 2-3 hours easily, but not a sweater. Turn it over each time you change towels.
And that's it. A lovely, soft, cuddly garment to keep the recipient warm and toasty. Here in northern New Jersey, it's still cold enough to need a woolly sweater. Mail out the garment to DD, who lives in the Frozen Northland, and then cast on for another sweater. Email a pic to Miss P, the MN grand, and try to convince her that she needs a sweater next year. Hah! Middle school kids resist such stuff, silly kids.
A vest for the Hubz. The Hubz is not a delicate little creature like I am. I knit 36" sweaters. This thing is 50" around. Fingering weight yarn on size 3 needles. It'll take forever. But, he wants a vest, so no sleeves!!!!!! I'm not in a hurry with this one, since he won't wear it any more this season. But next fall, when it gets cool again, then he'll have it.
I think I'll put a bunch of my fake cables on it. V-neck, because that's what he likes, and I also like knitting them.
Thank you all for your kind words. Don't be intimidated by the gansey; I've been doing my own sweater thing for 45 years, so I can do it in my sleep. But you can do it too.
Labels:
blocking,
fake gansey,
gansey,
gansey designing,
gansey sweater,
ganseys
Friday, March 21, 2014
Designing and knitting a fisherman's sweater - part 6
So, now the bodice is complete. You can see the front, and where I'm working the sleeve. Yes, it looks like a mess; blocking takes care of all that. When you work a couple of purl sts between the various patterns, those sts act as ribbing, and to get the proper effect, you have to wet block the garment and smooth it out.
I've already done the neck ribbing. It's so nice to get this donebefore you deal with sleeves. This way, when you are finished with the sleeves, you are done! Finish in all the ends and then block.
Here's a nice close-up of the bodice. I loved knitting this, and now have a hankering for an entire garment with fake cables and twist sts and lace.
The sleeve incorporates the fake cable and the twist st pattern, plus I added the diamonds, which are just a larger version of the cross pattern that separates the body from the bodice. About 10" done, and I should be finished with the sleeves by early next week.
Labels:
bodice,
gansey,
gansey designing,
gansey sweater,
ganseys,
knit,
purl,
sleeves
Monday, March 17, 2014
Designing and knitting a fisherman's sweater - part 5
So, now the body is done up until about an inch or so from the armhole. Here's where I like to put in a pattern that separates the body from the bodice, and that is that cute little diamond pattern. I use this one a lot because it works very well.
Now I'm ready for the bodice. This is the sweater from the beginning of the armhole to the shoulder. I always work the back first so that I can see where I want to place the neck opening. I like to put in a number of patterns here, just for the fun of it. Typically I use a lace pattern, my favorite fake cable, a knit/purl pattern, and lately I toss in a twist stitch pattern. This is where I veer away from traditional gansey patterns, and here is where I have the most fun.
These patterns are mostly from Japanese books, with the exception of the ladder one (the one on the far right and left. I usually pick out the lace pattern first, and then add the rest. My one caveat is that there is no patterning on the wrong side. All I want to do is knit the knit stitches and purl the purl stitches. Life is too short for me to pattern on the wrong side, and I will completely modify a pattern so that I can do this. So, when I have a bunch of purl stitches on the right side (look at the lace pattern), I know that I can just follow along on the wrong side. Makes it easy and very pleasurable to knit. (On the body and sleeves, however, because they are knit in the round, I will use any stitch at all since all the work is done right in front of me on the right side.)
That fake cable appears in everything these days; I love it that much. The twist stitch pattern is between 2 of the fake cables. No cable hook here; these guys are just twisted, and only on the right side. What I love is that the outer edge of this pattern looks as if I'm manipulating something or other. It's just a trick of the eye; you want to see it look like an outside edge, and it's not. Just knitted along.
I'll work the back until I have approx 8-8.5", place the stitches on a piece of yarn and then work on the front.
Labels:
charts,
fake cable,
fake gansey,
gansey,
gansey designing,
gansey sweater,
ganseys,
knit,
purl,
sweater
Thursday, March 13, 2014
Designing and knitting a fisherman's sweater - post 3
Here's my progress on Emily's fisherman's sweater. This is about 5.5 inches so far. You can clearly see the 2 patterns and you can see how the 2 purl stitches separate the patterns. One of the side benefits of those purl stitches is that it acts a bit like ribbing, pulling the sweater in. In the past, I made my sweaters much wider, but now like them far more fitted. Not body hugging, but more shapely. This is, for me, a great way to shape a sweater without decreases. The sweater somewhat molds itself to my (and my daughters') body shape, expanding at the hips, coming in at the waist, and then expanding toward the bust. It's a great way to cheat on shaping. When blocked, those ribs will open up, so that it will become a subtle shaping.
Another nice reason for the purl stitches is that I don't have to set off my patterns with a stitch marker; the purls do that for me.
Not the greatest picture in the world, but here you get a good closeup of the patterns. The safety pin is my way of measuring how much knitting I've done each day. I love to have goals, so this does it. Most of my stitch markers are also safety pins, the plain ordinary ones, not the ones supposedly better for knitting. I've done that. Eh. I also use pretty markers, although for some reason, I tend to lose them. If you need to use a lot of stitch markers in a garment, safety pins are the cheap resource. Pretty markers are pretty, but pricey. On the other hand, they can be so pretty. I've tried yarn markers. Nope, they don't work for me. They keep getting caught up in the knitting.
Take a look at how messy my knitting is. Nothing at all looks nice and even. I'm a fast knitter, and knit Continental style and am not particularly smooth. But I have a secret: I knit in wool. When you wet block your sweater, all of that mess smooths out and you have a lovely garment. Wool has this amazing property of memory and is just about the best material there is to knit. It helps that I live in an area which has cool and cold weather. I'm not sure what I would knit with if I lived in Florida.
So now I'll just keep knitting up the sweater until about 1 1/2 inches from the armhole. I'm aiming for 15" on the body, so at 13.5", more or less, I'll stop these patterns. That should take me about 3 days worth of knitting. I'm a fast knitter and love to zoom along. You may knit English/American style (throwing rather than picking), and that is usually slower than Continental. I knit my way because my mom and aunt taught me, and they were both from Europe. I can knit English, and do it in stranded knitting with holding one yarn in one hand and the other yarn in the other hand. Another time, I'll do a post or two on this.
Rachel's gansey is finished but not blocked. As usual, my sweater at this stage looks awful.
Is this bad or what? Have no fear, it will come out just lovely. It is very long, but she wanted a longer sweater. Those skinny sleeves and that drawn-in bodice will block out beautifully. I was going to blog about how I wet block, but I'll save it for when the green sweater is done. I will take pics so you can see that this mess of a garment will look so nice when dried.
Wednesday, March 12, 2014
Designing and knitting a fisherman's sweater - part 2 - very long, but necessary post!
Yesterday we talked about swatching and gauge. My gauge over 4" is 5 sts/inch. I want a 36" (in circumference) sweater, so 5 x 36 = 180 sts.
As you can see, I've drawn a schematic on my instruction sheet. Pretty straightforward, it tells me everything I need to know at this point. I know the number of stitches need for the body, 1/2 of those stitches for the front and back, the number of ribbing stitches I need. I don't need to do anything else until I start to get to about 1 1/2 inches from the underarm.
These are my written notes. I'm actually doing this just for you. The schematic gives me all the info I need, but for the novice, it helps to have some written instructions.
See the word "Rib"? Typically the ribbing is about 90% of the body sts, which would be 162 sts. But I use k2, p2ribbing, which is a multiple of 4, and 4 doesn't divide evenly into 162. So, I decided on 164 sts for the rib. I could have gone down to 160 also. Doesn't really matter with this weight yarn. If I were knitting with chunky yarn, then those 2 sts would make a big difference.
I mark the beginning of each round with a stitch marker, and place on halfway across, thus setting up my front and back.
The body number, 180 stitches, is still tentative. I know that's approximately where I want to be, but I haven't charted out the pattern yet. I chart out 1/2 the pattern. Using my graph paper (and here paper is so much easier than charting programs), I mark out 90 stitches, which will be the front. The back is exactly the same, so I only have to do one chart.
The first picture shows my instruction sheet with schematic and instructions and chart. The second one is a close-up of the pattern. The chart is 90 stitches. I've only done the first 2 patterns fully since they just repeat along the row. I do chart the first few rows all along just so that I keep my count correct.
Notice that I have an extra stitch at the end of the chart. That's my "seam" stitch. I like to run a purl stitch as a fake seam on both the front and back. So, I will knit following the chart, purl that last stitch, slip my seam marker, and then repeat. You can leave it out, but I like having a seam stitch, which I will then work up as my center of the sleeve.
Swatching the patterns. With knit/purl patterns I don't swatch them first. I've been doing this sooooo long that I don't need to do it. I can tell pretty much what the pattern will look like from the chart. I don't even use knitters' graph paper. BUT, you should knit up some swatches, just to see if your gauge is different from your stockinette swatch. And of course you want to see what it actually looks like in your yarn. If I were doing cables or lace or twist stitches or color work however, I would definitely swatch and swatch some more. Cables, twist sts and stranded color work narrow the garment, while lace opens it up. In these cases your stockinette swatch and your pattern swatch will NOT have the same gauge.
OK, so where do I get my patterns from? In the body of this sweater, I'm using authentic fisherman stitches which I've found in 3 books:
You can probably find these at your library or through inter-library loan (ILL). You could try eBay or Etsy or Amazon. I don't know if they are still in print. You knitting guild might have them in its library. A great source for all things knitting is Schoolhouse Press. Or you can design your own knit/purl pattern.
Charting. I start smack in the middle of the chart and then work right and left of it. I like to separate my patterns with either 2 purl stitches or purl, knit, purl. I just kept working them until I found that I was 3 sts away from the end on the right and 4 on the left. I decided that I didn't need to work any pattern over 3 sts, so left them as stockinette. The fourth stitch on the left is my seam stitch. Questions? Does this make any sense?
Sometimes the patterns don't work out nicely with too many stitches at either end. Then I might switch them around and have the middle pattern as something else. You can repeat the same pattern all along the row, separating them with purl2, or even not separating them at all. You play with it. Yes, there can be a lot of erasing, but this is the real creative part of the process, and here is where you play. It is such fun. Since your are knitting up your individual patterns, you can lay them next to each other to see if you like how they look. I don't, but then I've been doing this for a thousand years.
Begin knitting. Cast on your ribbing, work a couple of inches or more as you like, then increase to the body stitches. To make this easy, divide the number of stitches to be increased by two (front and back) and then, more or less evenly. Switch to a round of stockinette, and then increase your stitches. So, I needed to increase a total of 16 sts, 8 for the front and 8 for the back. It helps to think of increasing like this, makes it much more manageable. Then, the fun begins. Start your chart.
Now I just keep knitting until I am about 1 1/2 inches from the underarm. At that point I'll insert a dividing pattern. For now, I'll happily motor along with Emily's sweater.
Questions? Feel free to ask in the comments. I'll happily work with you on this.
Labels:
charting,
gansey,
gansey designing,
gansey sweater,
ganseys,
graph paper,
knitting,
schematics
Tuesday, March 11, 2014
How I design and knit a fisherman's sweater.
I've had a few folks interested in my ganseys and how I do them, so I'm going to blog about the process from the beginning to the end. I'll post ideas for you if you want to do this yourself in italics.
First of all, I'm not knitting a genuine gansey. I just like the way Eriskey ganseys are designed, so I've been making fake ones for years. They are easy, interesting and lots of fun to do. I hope you will try this out, or if not, at least get some idea of the process.
Then I decide on the size needles. I know that I knit loosely, so I never pay attention to the suggested needle size or gauge on a yarn label. This yarn calls for a size 6 needle with a gauge of 22 sts/inch. Nope. That would feel like a board rather than a fluid sweater. So, I made my gauge with a size 4 needle.
For first time sweater designers, I would play around with needles. If you knit tightly, you just might want that #6 needle or even a #7. Since I'm such a loose knitter, I debated on using either a 4 or 5, and I decided that whichever swatch looked the nicest, that would be my needle. I ended up using a 4 with a gauge of 5 sts/inch.
I cast on enough stitches for about 6", and work enough rows in stockinette to get an accurate gauge. My gauge is 4" = 20 sts. Hence 1" = 5 sts. Yes, I know, that is a very small swatch. I've been doing this for so many years that I can get an accurate picture of stockinette with about 10-14 rows.
Why stockinette? Many ganseys have knit/purl patterns, and stockinette is pretty close to the gauge I would get. I know that my purl rows are a tiny bit looser than my knit rows. When I knit in the round, I have to take that into consideration since there are no purl rows in stockinette in the round. However, I use knit/purl patterns in the body of my ganseys, and my gauge is accurate in the round without me having to compensate for no purl rows because of those purl sts. (If I were doing cables and/or lace, this wouldn't work because those sts really affect gauge.) Does this make any sense? If not, comment, and I'll write back.
For you, I would do a stockinette swatch in the round. If you don't like how it drapes or feels, change needle size. Yes, it is a pain to do this, but you need to make swatches for a commercial sweater, too. Anyhow, it'll give you a chance to get to know the yarn. Make it a good 4 inches long, and measure over 4 inches to get an accurate gauge. Write it down someplace so that you have a record of it. Why? Suppose you want to knit the sleeves just in stockinette, this way you have a gauge already done. When you are finished, take a picture of it, and then rip it out. Yep, frogging is part of knitting.
Here's how I keep write things down. Graph paper because I chart on graph paper, and this way the entire design is on a couple of sheets.
First of all, I'm not knitting a genuine gansey. I just like the way Eriskey ganseys are designed, so I've been making fake ones for years. They are easy, interesting and lots of fun to do. I hope you will try this out, or if not, at least get some idea of the process.
Pick my yarn and needles
I don't buy a pattern and then buy yarn accordingly; instead I pick out yarn, and work with that. For Emily's gansey, I bought Rowan Pure Wool DK ( 50 gm, approx 137 yards (125 m) I had to special order this, so I have a bag of 10 skeins, but I think I'll only need 8, but we'll see. I usually rely on the shop owner to give me an idea of how many skeins a sweater needs. I work a 36" sweater, so I use that as my source for size. That is Emily's size also, although she wants the back to be a tad narrower. I'll start of with 36" and then make adjustments in the back.
For first time sweater designers, I would play around with needles. If you knit tightly, you just might want that #6 needle or even a #7. Since I'm such a loose knitter, I debated on using either a 4 or 5, and I decided that whichever swatch looked the nicest, that would be my needle. I ended up using a 4 with a gauge of 5 sts/inch.
I cast on enough stitches for about 6", and work enough rows in stockinette to get an accurate gauge. My gauge is 4" = 20 sts. Hence 1" = 5 sts. Yes, I know, that is a very small swatch. I've been doing this for so many years that I can get an accurate picture of stockinette with about 10-14 rows.
Why stockinette? Many ganseys have knit/purl patterns, and stockinette is pretty close to the gauge I would get. I know that my purl rows are a tiny bit looser than my knit rows. When I knit in the round, I have to take that into consideration since there are no purl rows in stockinette in the round. However, I use knit/purl patterns in the body of my ganseys, and my gauge is accurate in the round without me having to compensate for no purl rows because of those purl sts. (If I were doing cables and/or lace, this wouldn't work because those sts really affect gauge.) Does this make any sense? If not, comment, and I'll write back.
For you, I would do a stockinette swatch in the round. If you don't like how it drapes or feels, change needle size. Yes, it is a pain to do this, but you need to make swatches for a commercial sweater, too. Anyhow, it'll give you a chance to get to know the yarn. Make it a good 4 inches long, and measure over 4 inches to get an accurate gauge. Write it down someplace so that you have a record of it. Why? Suppose you want to knit the sleeves just in stockinette, this way you have a gauge already done. When you are finished, take a picture of it, and then rip it out. Yep, frogging is part of knitting.
Here's how I keep write things down. Graph paper because I chart on graph paper, and this way the entire design is on a couple of sheets.
You can use your computer, a charting program, or plain old graph paper. A very good program is Intwined Pattern Studio You can google this on the web. I use graph paper because it is so user friendly. You make a mistake, you erase, but I've also used Intwined, and it's very good.
OK, that's enough for today. Next post will be pattern choosing and swatches.
Labels:
designing,
gansey,
gansey designing,
gansey sweater,
ganseys,
gauge,
knitting,
needles,
yarn
Friday, March 7, 2014
Friday's Knitting
Yep, that's a sleeve in progress. I know; it looks small, but it really isn't. Once you block the sweater, it will all come together very nicely. Oh, and that waviness where I've picked up the sleeve? That will block out quite nicely.
I'm using 2 patterns from the bodice, the little fake cable and the twist stitch pattern, and diagonal one from the body.
When I finish the entire sweater body, I join the
shoulders with a 3-needle bind off, and then I immediately work the neck
finish, just to get it out of the way. I know that by the time I'm
done with the second sleeve, I will hate having to do the neck; I'll
just want it finished already.
So, the sleeves ought to be done by next Friday, if not sooner. Then I will start to work on Emily's sweater. I'm on a roll here and better keep up with it because when I'm done with sweaters, I'll really be done.
I'm using 2 patterns from the bodice, the little fake cable and the twist stitch pattern, and diagonal one from the body.
Here's how I do the sleeves: pick up and knit half the underarm sts, then all around the armscye and then the other half of the underarm sts. I never bind off those underarm sts, just put them on a piece of yarn to hold them in place. I have one stitch that is center to the bottom, and that becomes my fake seam. It looks kind of squooshy here, but it's OK.
Labels:
fake cable,
gansey,
gansey sweater,
ganseys,
knitting,
twist stitches
Wednesday, March 5, 2014
What's What on Wednesday
The back of Rachel's sweater. Looks foreshortened because of my angle.
Here's the bodice on the back. It's a bit compressed but will block out just fine.
Here's the band separating the body from the bodice. Looks kind of weird, but again, will block out well.
A little bit of the front. You can see the band and about an inch of the bodice. Doesn't look like much right now.
The bodice patterns, which are not typical gansey patterns. The center pattern is a nice lace.
Next to it are the 2 fake cable guys. These are done by slipping the 3rd st from the end of the needle over the first two, then k1, yo, k1 to make the three sts again. Cute stitch and one of my all-time favorites.
Next, again between the fake cables, is a little twist st pattern, with no cable needle required. I love how this looks. And the final pattern is a Jacob's Ladder, which is a real gansey pattern.
Such fun! I might finish the front bodice today, and then knit the shoulders together, pick up and knit the sleeves. I'm thinking of combining that diagonal pattern from the body with the fake cable for the sleeve. I'll give it a try, and if I don't like it, I'll just frog it. I knit, therefore I frog.
Reading? Pagan Spring by G.M. Malliet. Funny mystery in a tiny English village with a cute Vicar and an odd assortment of characters.
Sewing? Nope. Too busy knitting and working out and baking bread and celebrating the Big Birthday. But I am thinking about it and drooling over fabric. Not buying any, which is good.
Labels:
book,
gansey,
ganseys,
knitting,
Pagan Spring,
Rachel's sweater,
reading,
sweaters
Subscribe to:
Posts (Atom)